Monday, May 13, 2013

My changes to Quiltmaker's Garden (so far...)

This is what I have in EQ7:

My Revised Version

I made the Birds and Watering Can larger,
and the Butterflies smaller.
I was able to swap the spots for the Birds and Butterflies, but I had to make a few changes to accommodate the larger Watering Can.

I also replaced the white patches in the blue and yellow pinwheel flower blocks with sky background.

I haven't drawn the tall flowers or the applique into EQ7 yet,
but I'm pretty happy with it so far.

This is the original quilt from the magazine:

Original Version

Saturday, April 6, 2013

TATRWJ - Row 6, Block 7

My tenth "Trip Around the Rainbow With Jane" block.
TATRWJ - Row 6, Block 7
Completed on Apr. 5, 2013 (31pcs)
TATRWJ - 10 Blocks, 0 Triangles, 0 Corners, 226 Pieces


I used paper-piecing for this block, and all in all it came out pretty good. Usually my blocks come out too small so this time I tried sewing just a TINY bit on the right side of the line on the paper and it came out much closer to size. Although it was a bit large on a couple of the outer points of the big star. I just took some of the seams in a little bit and it came out better.

The center star went together pretty well. After sewing the seams in the tiny star I trimmed them to 1/8" to cut down on some of the bulk. Since I use a tiny stitch when paper-piecing I figure that should hold it well enough. I've done this a lot on some of my Harry blocks with too many small pieces in one area. One of the points on the tiny star is cut off, and I'm debating whether to fix it. It seems a bit bumpy so I may be able to just take in the seam a tiny bit to remedy it. Maybe....

Saturday, March 30, 2013

TATRWJ - Row 9, Block 9 & Row 9, Block 7

My eighth "Trip Around the Rainbow With Jane" block.
TATRWJ - Row 9, Block 9
Completed on Mar. 28, 2013 (35pcs)
TATRWJ - 8 Blocks, 0 Triangles, 0 Corners, 158 Pieces


And my ninth "Trip Around the Rainbow With Jane" block.
TATRWJ - Row 9, Block 7
Completed on Mar. 29, 2013 (37pcs)
TATRWJ - 9 Blocks, 0 Triangles, 0 Corners, 195 Pieces


Both of these were done using paper-pieced patterns, but next time I might just do Row 9, Block 9 with regular piecing. It didn't seem to be worth the extra work with such plain pieces, but I had already cut out the pieces with extra seam allowances for paper-piecing, so I just went it, instead of trimming all the cut pieces.

Thanks to Minka from Minka's Studio for asking me how I was coming along, which gave me the incentive to finally sew a block.

I'm not sure whether I'm going to make the entire quilt as one quilt or not. I'm toying with the idea of making all the blocks, but putting them into about 7 smaller lap size quilts, each with a different design. The thought cauldron is bubbling, but no decisions will be made until I have the 25 center blocks that are all cut and ready to sew completed. Then I can decide. Until then, I'm hoping to get another sewing spurt soon. Sometimes, life gets in the way of quilting. But for now, I've finally sewn something.

Saturday, August 18, 2012

Distracted by Harry

I can hardly believe it's been 2 years since I've made another Jane Stickle block. Lots of my time has gone to making my Harry Potter paper-pieced quilt.


I designed every block and the quilt layout and the text, and all of the patterns have been posted for free on my Comcast site.
UPDATE: Comcast has removed ALL personal web pages.
The patterns have been moved here for now:

https://drive.google.com/drive/folders/0By36MfVm7GtjeWw3U3lsZEdpcXc?ths=true

I completed my Starting with Jane quilt which was a present for my sister and brother-in-law.

It underwent a few changes since the original design. I decided to make a small lap quilt instead of a wall-hanging, and this is what I ended up with.


The squares had been done as quilt-as-you-go and everything had been hand-sewn and hand quilted. But in order to finish it, I switched to machine sewing, added some plain-type squares, and turned it on point with borders.

I decided to try free-motion machine quilting on the borders in the leaf type designs, (where the stitches are EVERY size), and some quilting with the feed-dogs up where it was just curvy a bit. This is the first quilt I ever did any free-motion quilting on, but it's not too bad, if you only look from far.... I did learn never again to try to add mitered borders when adding the borders after the middle is already done and quilted. (NOT fun!)


It's a bit of a mish-mash with a hand-quilted center, and machine-quilted borders, but my sister really likes it. Having some arthritis problems makes me wonder if I might get back to Jane blocks if I started machine sewing some of them. I have the rest of the first 25 center blocks all cut out and waiting.

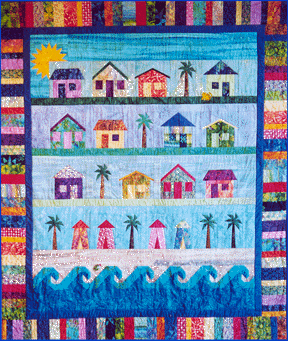
BUT, after finishing the long journey with the Harry Potter quilt, I felt like a bit of a break with some less finicky, larger than 5 inches square blocks. So I bought the Beach Cottages pattern.


But the one I'm making is with pastel colors to remind me of Bermuda where I spent my honeymoon, and we took our first cruise for our 35th anniversary last year. That quilt is done, and is now being pinned for machine quilting.

I've also started doing the Quiltmaker magazine anniversary quilt called "Quiltmaker's Garden". It's a 5 part series, and I'm still on Part 1, but I do have all my fabric bought. This is what the magazine quilt looks like.


I'm making a few changes and will have large birds and smaller butterflies in my quilt.

So I'm afraid it will be a while longer until I get back to the tiny Jane blocks. I have a new camera this year, so we'll probably go back to Vermont and I'll try to get some more pics of the original quilt for those who can't get to see it in person.

That's it for now.
Happy Sewing!


Wednesday, October 6, 2010

Possible Changes to Pattern

When I posted the picture of the original block next to my sewn block, I noticed that some of Jane's corner pieces don't look pieced.

I was hoping to get a close-up view when I visited the quilt this past weekend. However, this year the quilt was displayed in a different area, with less light, and you had to stand further back. So I really couldn't tell if there were seams or not, even in person.

Jane's Block
Photo of Jane's Block

I've stared at all the photos I have, and the poster, and the quilt, and it always looks like one of the corners is pieced (the bottom left corner) to make a complete circle, the way my pattern is. But a couple of the corners definitely look like they're not pieced. So I created a second pattern without pieced corners.

Pattern Changes
TATRWJ - Row 6, Block 6 - Changes Marked in Green

If I make this block again, I'm undecided as to which pattern I'll use.

Wednesday, September 22, 2010

TATRWJ - Row 6, Block 6

My seventh "Trip Around the Rainbow With Jane" block.
TATRWJ - Row 6, Block 6
Completed on Sept. 16, 2010 (25pcs)
TATRWJ - 7 Blocks, 0 Triangles, 0 Corners, 123 Pieces


Jane's Block
In War Time - Row 6, Block 6
Photo of Jane's Block - With Blue Lines Added to Outline the Block

This block was put together like a nine patch, and then the pieced together circles were appliqued onto the background.

I cut the circles out of my freezer paper pattern. Then I pressed the background freezer paper section to the background, and the freezer paper circles inside the fabric circles. I find this makes it easier to place the circles where they belong because you can feel the edges of the paper through the fabric.

I like to sew a basting stitch around the circle in the seam allowance, and then pull it tight to bring the seam allowance inside. Then I press it, and then I baste it down from the top, going through the right side of the circle, and the freezer paper and the seam allowance. It's more work, but it helps me to get rounder circles.

Sunday, February 14, 2010

TATRWJ - Row 6, Block 5

My sixth "Trip Around the Rainbow With Jane" block.
TATRWJ - Row 6, Block 5
Completed on Feb. 12, 2010 (9pcs)
TATRWJ - 6 Blocks, 0 Triangles, 0 Corners, 98 Pieces


Jane's Block
In War Time - Row 6, Block 5
Photo of Jane's Block - With Blue Lines Added to Outline the Block

For this block I printed a freezer paper pattern, and cut out the appliques. Then I pieced the center applique.

After that, I pressed the freezer paper for the center applique onto the back of the joined piece, then folded the seam allowances under and basted them to the paper, and pressed again. I did the same with the 4 melons. This way I had nice sharply outlined pieces to applique.

Then I pressed the remaining piece of freezer paper (the background with the appliques cut out) onto the center of a 6 inch square (I wanted extra that would be trimmed off at the end).

When I held the background square up to the light, it was easy to see where the appliques should go, and I pinned them over the holes in the paper that I could see. After that, I could just sit and sew until all 5 appliques were done.

Then I slit the back of the center (careful to cut ONLY the background fabric!) and cut the background down to about 1/4" seam allowance, and removed the basting and freezer paper. For the melons I only cut a slit since they were so small, and removed the basting and paper.

One final press and trim, and DONE! The freezer paper inside the applique gives a nice edge to sew against. I liked this method, and will use it again.

Tuesday, February 9, 2010

TATRWJ - Row 5, Block 9

My fifth "Trip Around the Rainbow With Jane" block.
TATRWJ - Row 5, Block 9
Completed on Feb. 9, 2010 (21pcs)
TATRWJ - 5 Blocks, 0 Triangles, 0 Corners, 89 Pieces


Jane's Block
In War Time - Row 5, Block 9
Photo of Jane's Block - With Blue Lines Added to Outline the Block

This block went together similarly to Row 5, Block 7, except the circle was MUCH easier to applique than the odd shape in Block 7. I paper-pieced the rays, then joined them into a circle.

After basting down the edges of the applique circle and pressing it, I sewed the circle onto the rays. Then I added the four remaining background strips. I like the way it came out.

Small Again!
This is another block that I used one of my patterns that I had printed before adding the extra seam allowance to the patterns. It came out a tad small again.

I'm convinced that the extra around the outside edge is needed, at least for me when paper-piecing. So I'm going to re-print my patterns onto freezer paper WITH the extra seam allowance on the edges. I had already printed all 25 patterns for the center, but re-print I must!

TATRWJ - Row 5, Block 7

My fourth "Trip Around the Rainbow With Jane" block.
TATRWJ - Row 5, Block 7
Completed on Feb. 8, 2010 (12pcs)
TATRWJ - 4 Blocks, 0 Triangles, 0 Corners, 68 Pieces


Jane's Block
In War Time - Row 5, Block 7
Photo of Jane's Block - With Blue Lines Added to Outline the Block

I paper-pieced the fabric pieces that are around the center applique, and then joined it. I printed out a freezer paper pattern, and cut out the center applique. I centered and pressed the outside section to the back of the main piece, and the pressed the freezer paper center to the back of my applique fabric.

After basting down the edges of the center applique and pressing, I added the applique on top of the pieced section. I can feel the edges of the applique's freezer paper, and the pieced section's freezer paper as I sew, so it makes it easier to keep the applique from shifting out of position.

Then I added the four background strips, and pressed the block. Then I removed the freezer paper, and gave it a final press with a dry iron.

My applique skills are beginner at best and I had a hard time in the inner points. Hopefully the next one will be better!

TATRWJ - Row 5, Block 7, Old & New

My two blocks side by side.
                Re-Drafted 5" block         and         4 1/2" sashed block

In my new block the center applique motif is much less round, and the strips are wider than my 4 1/2" block. When I made the new block I forgot to use the mostly ORANGE sections of the fabric when I cut out the fabric for this block, so this one is more red than I had planned, even though it's the SAME fabric.

I like the look WITHOUT the pieced section under the applique better, I left it in on the 4 1/2" block and don't care for it as much. From now on, I think I'll cut away any pieced sections under an applique.

Monday, February 8, 2010

Old Blocks - Un-Sewing & Re-Sewing

I've "un-joined" some of the old 4 1/2" blocks that had been sewn together for the my original quilt plan, in the quilt-as-you-go method. I had 5 blocks sewn together for one row, and the other 2 joined together for a second row.

Five blocks, quilted and joined

Five blocks, view of back and quilting

Then I "re-joined" the blocks into the new rows for my "Starting With Jane" wallhanging.

Blocks Sewn Into Rows - Rows Not Joined Yet

I've got lots more work to do to make the wallhanging, but I've got all the patterns for the "filler" blocks done.

TATRWJ - Row 5, Block 8, Old & New

I wanted to see the difference between these two blocks, one done in my new pattern drafted from Jane's quilt, and a 4 1/2" block made from the software. I added a "simulated" sash strip to the 4 1/2" block to show 1/2 of a sash strip around all sides. (With the sash strips, the 13 blocks in each row plus the sash equals 65" across, which averages out to 5 inches per block.)

This brings both blocks to 5" square, since Jane's quilt is made entirely with 5" blocks, and DOES NOT have sash strips. Jane did add borders to many of her smaller blocks to bring them up to a 5" size, but many others are a full 5" in size.

Jane's Block
In War Time - Row 5, Block 8
Photo of Jane's Block - With Blue Lines Added to Outline the Block

My two blocks side by side.
                Re-Drafted 5" block         and         4 1/2" sashed block

Jane's block has a higher ratio of the focus fabric (red) around the outside of the design, and more background fabric around the block.

Lots of Jane's blocks look smaller, and when you put them next to the ones that use the full 5" for the block, the differences are more noticeable. It really gives a more random, and less structured look to the quilt. I think this is what really attracts me to Jane's quilt. The various sizes of the designs in the blocks is part of its beauty to me.

TATRWJ - Fabrics Chosen for 25 Center Blocks

I've chosen fabrics for the center 25 blocks. That's where I'm starting my quilt, right in the MIDDLE. The first block I made is Row 5, Block 5. (My numbering matches the way the quilt was displayed at the Bennington Museum, in which the basket block is facing up, and not sideways.)

Center 25 Blocks with Fabrics (in EQ5)

Actually, these are the same fabrics I chose when I started on this project last year before the re-drafting of the patterns. But I still like the color scheme, so I've decided to keep these fabrics for this section.

I'm considering doing a quilt-as-you-go again. But instead of doing it block by block, since there's no sashing, I think I'll do it in a dozen or so sections. I still haven't settled on the exact method yet. But these 25 will definitely be one of the sections.

I just can't picture quilting a quilt this big on my lap in one piece!

Sunday, February 7, 2010

Updates to Sewn Patterns

After sewing the first 3 blocks, I've found some minor changes that I'd like to make to a couple of the patterns if I sew the blocks again.

TATRWJ - Row 5, Block 5, Pattern Changes

My Block
TATRWJ - Row 5, Block 5

Jane's Block
In War Time - Row 5, Block 5
Photo of Jane's Block - With Blue Lines Added to Outline the Block

Pattern Changes
TATRWJ - Row 5, Block 5 - Changes Marked in Green Circles

If I make this block again, I'm going to try not to have the background melons connected to each other as much, and turn the edges under right up to the joining points. It ended up this way because I was unfamiliar with using the arc tools in EQ, and couldn't figure out how to make the arcs touch each other less where they joined when I made the pattern.

I've since figured it out and fixed the pattern, but not in time for the sewn block. I want to eliminate the purple seams, and the melons will be smaller and more like Jane's.

TATRWJ - Row 5, Block 6, Pattern Changes

My Block
TATRWJ - Row 5, Block 6

Jane's Block
In War Time - Row 5, Block 6
Photo of Jane's Block - With Blue Lines Added to Outline the Block

Pattern Changes
TATRWJ - Row 5, Block 6 - Changes Marked in Green Ovals

On closer inspection, I noticed that the side triangles on Jane's block are only touching in ONE out of FOUR places. When I originally made the pattern I thought maybe they should touch, and it was easier to it design that way, just dividing the space into two equal sections. After staring at it some more, now I think that maybe the original pattern had the triangles NOT touching. So I've adjusted the pattern to reflect this, but again my block was sewn from my first version of the pattern. If I make another block, I'll use my newer pattern with the side triangles NOT touching.

Future Changes to Patterns

It looks like lots of the patterns I made will be changed before I'm done.

When you actually sew the block and then compare it to the original, small differences become more noticeable.

I drew all the center blocks into EQ5 (so that I could use them in the DJ software), but I wasn't all the familiar with the program at the time. Obviously, by the time I got to the 169th pattern, I was getting better at it.

The first patterns I drafted will definitely need to be looked at more closely for things I can fix to make them better (more like the original designs).

TATRWJ - Row 5, Block 6

My third "Trip Around The Rainbow With Jane" block.
TATRWJ - Row 5, Block 6
Completed on Feb. 6, 2010 (22pcs)
TATRWJ - 3 Blocks, 0 Triangles, 0 Corners, 56 Pieces


This block was completely paper-pieced in 6 sections. The left and right sides were 2 sections each (a long section and a corner section), and the center was pieced in 2 sections on the diagonal line. Then the 3 joined sections (left, middle, and right) were joined.

This block went together pretty quickly and easily. My point matching could be better, but it's fine. I've decided I'd rather have blocks than are done, instead of blocks that aren't because they're not perfect. There are so many blocks, that it'll never get done if I get too picky!

Small Blocks
I'm finding that blocks are coming out just a tiny bit too small. I'm going to add an EXTRA 1/4" seam allowance around all the paper-piecing patterns, and then I can trim them to the right size when they're done. I'd like to have a nice full 1/4" seam allowance to join the squares in order to keep the quilt the right size as much as possible.

Pattern Preparation & Piecing Info
I've been printing TWO copies of the pattern onto freezer paper. The FIRST copy is cut into SECTIONS to be used for paper-piecing. I sew by hand, and sew right through the freezer paper. It's not too hard.

The SECOND copy is totally cut up into pieces. Then I iron each pattern piece onto the appropriate fabric with about 3/8" around each piece (more is better). Then I cut them apart.

Now I have a labeled piece of fabric for EVERY PATTERN PIECE for paper-piecing or regular piecing. It saves me lots of time, and makes it easier to just keep sewing with all the pieces pre-cut.

If I'm just regular piecing, I'll trim the seam allowances to 1/4", and then when I sew, I can tell it's right when my seam is right up against the paper on the top and bottom.

For paper-piecing, the paper shows me exactly how I had planned to position the pre-cut piece. Then I peel the paper, double check it covers where it should and sew on the line.

After piecing, I like to give a quick press with one of the "stick" wooden irons. Then I have less distortion when I press with the mini-iron to get it to stick to the pattern to trim for the next section.

Thursday, February 4, 2010

TATRWJ - Row 5, Block 8

My second "Trip Around the Rainbow With Jane" block.
TATRWJ - Row 5, Block 8
Completed on Jan. 25, 2010 (21pcs)
TATRWJ - 2 Blocks, 0 Triangles, 0 Corners, 34 Pieces


I used the same method that I used in the 1st block to piece this one. I appliqued the melons to the center piece.

Then I paper-pieced the ring.

Next I basted the inner "circle" inside the seam allowance and tightened the thread a bit to pull the seam allowances under the edge of the freezer paper.

Then I pressed it well, and appliqued it to the ring. Then I sewed on the outer pieces.

I'm hoping my applique skills improve as I practice more, but it's definitely a "keeper".

Saturday, January 2, 2010

1st Block! (Again) & New Quilt Names

I've finished re-drafting all the blocks in Jane's quilt. After doing all the center blocks, I decided that I might as well go all the way and do the triangles and corners as well. The triangles are bit more challenging than the blocks, so I've been using Quilt Assistant to draw the blocks, then I export them to PJ5 projects. In EQ5 I convert them to motifs for my custom layout. A custom layout is the only way I could figure out to replicate the triangle and scallop borders in EQ5.

Finally! On to sewing the newly drafted blocks!

Since the blocks I've already made are only 4 1/2" in size and already quilted, and I need 5" blocks for the newly re-drafted patterns, I have to start over again with BLOCK 1 for the new quilt.

Here is a picture of my first sewn block using my re-drafted patterns of Jane A. Stickle's quilt.
TATRWJ - Row 5, Block 5
Completed on Jan. 1, 2010 (13pcs)
TATRWJ - 1 Block, 0 Triangles, 0 Corners, 13 Pieces


TATRWJ - Row 5, Block 5 - Block Construction
Originally I had planned to just piece the curves, but I decided to practice applique and try something different.

I printed the pattern onto freezer paper, then I cut all the pieces apart and pressed them onto the wrong sides of my fabric. Since my pattern is colored, it was pretty easy to figure out which pieces went onto which fabric.

For the first sewing step I joined the 4 inside melons at their outer edges. Then with the freezer paper still on the fabrics, I pressed under the seam allowance on the inner edges. Then I reverse appliqued the joined piece onto the center section.

The freezer paper edges helped me to keep a nice round edge as I sewed, and it was easy to butt the applique up to the freezer paper of A1 that I could feel under it. So it was easy to tell if the pieces were where they should be. Now I had a nice completed inner circle.

Using the same technique, I sewed one applique piece to each of the corners pieces. Again the freezer paper inside made it much easier than I had anticipated. The four corner sections were then joined into a square with a hole in the center.

I pressed under the seam allowance on the circle using the freezer paper to get a good edge. Then using the same technique again, I appliqued the completed circle onto the square outer section. And voila, done! And all without any curved piecing whatsoever.

I had read tons of tips on applique before starting this, and I'm much more pleased with it than with my previous attempts at applique. The tips that helped the most, were (a) taking the next stitch a tiny bit BACK from where the needle came out, and (b) making sure to keep the stitches just UNDER the edge of the applique.

I also found the freezer paper extremely helpful. And since there were no enclosed pieces, I just peeled off the freezer paper when I was done. I will definitely use this method again where I can.

New Quilt Names

I've decided that the name of the new quilt I'm going to make from my re-drafted patterns is going to be:
     "Trip Around The Rainbow With Jane"
           "TATRWJ"
for short.

After considering what to do with the 7 blocks in the smaller 4 1/2" size, I came up with this wallhanging in EQ, which I call "Starting With Jane", since these were my very first Jane A. Stickle blocks.
Starting With Jane - Wallhanging (Layout in EQ)

Thursday, November 5, 2009

All 169 Center Blocks Done!

Well, I finally finished re-drafting all of the center blocks. Since I'm only so-so at applique, I've made a pieced version of EVERY block.

I made a second version using applique for 15 blocks, and I could do about 15 more with applique just to have a more complete block library, but it's good enough for now.

I have to say that this really gave me a much better appreciation for the variety of blocks, and got me much more familiar with them all.

Saturday, October 24, 2009

Starting Over With 5 inch Blocks

I started by scanning in the Poster I purchased at the Bennington Museum. In Paint Shop Pro I increased the contrast and other settings to try to make the sewing lines between the blocks show up as much as possible. Then I drew blue lines where the blocks were joined to make it easier to see each block individually.

This is a section of the poster with the added lines.
Center 25 blocks on poster with drawn lines

Then I used photos I took at the Museum (lots of which are taken at an angle, since the quilt is displayed on a slant board) and added lines again.

This is a section of a photo showing the added lines.
Sample cropped photo with blue lines added

Between the photos and the poster, I tried to get as close as I could to what might have been the original patterns that Jane used.

Jane's quilt is absolutely marvelous to behold in person. The stitch work is also quite well done, with lovely quilting. But the thing that amazed me on close inspection was that it wasn't "perfect". The strips that are added around lots of blocks are not always the same size on all sides. Pieces on one side of a block are not always the same as the pieces on the other side, seams don't always match perfectly. And yet, it's just wonderful and fascinating to behold. In other words, the quilt blocks don't have to be precision perfect in order to make a stunningly, beautiful quilt. So I've decided that even if my blocks don't turn out exactly as planned, I'll add them to the quilt as a record of my progress in quilt-making. Hopefully, later blocks will look better than my beginning blocks.

It's pretty difficult to guess what the original patterns Jane used might have looked like since the blocks aren't all exactly square any more. The quilt seems to have stretched over time, and the piecing isn't always exact. Pieces of a design may "touch" in one area, but not in others. These re-drafted blocks are my attempt to re-create Jane's quilt as closely as I'm able to given the circumstances.

I'll still be using a Trip Around the World layout like Jane's, and I'm still planning to do it with the 7 colors of the Rainbow (Red, Orange, Yellow, Green, Blue, Indigo, Violet). I think I might name the new quilt "Trip Around the Rainbow With Jane" ("TATRWJ" for short).

I had already started making blocks for a quilt when I saw Jane's quilt at the Bennington Museum. I have about a half dozen blocks I sewed at 4 1/2 inches in size, that I can't use in this quilt since I'm now going to be making 5" blocks. Maybe I'll put them in a wallhanging or something.

Wow! Saw Jane's Quilt in Person

After seeing Jane's quilt "In War Time" at the Bennington Museum on October 4th, the thing that surprised me the most was that the quilt has NO sashing, but many blocks have border strips around them, and when the quilt is viewed from a distance, it APPEARS to have sashing.

Photo taken at Bennington Museum (VT) in October 2009
Jane A. Stickle's quilt, "In War Time"

To see more photos that I took at the Bennington Museum in Vermont of Jane's quilt, go to my Flickr albums.
My 2009 Photos on Flickr
My 2010 Photos on Flickr

The quilt was displayed rotated 90 degrees to the right. When viewed this way Rebecca's Basket (J-12) is upright, Papa's Star (G-6) doesn't look upside down to me any more, and the hearts in the triangle blocks (RS-7 Fedelia's Hearts & RS-8 Love Forever) are also upright. Going by the differences I just noted, I prefer the way it looks displayed like this, it just looks "right" to me.

Since the various sized strips around some of the blocks makes some blocks appear larger and some smaller, it seems to tie in with the "variety" theme of the quilt. Since they're all different patterns, done in different fabrics, why not different sizes.

I've loved the random look of Jane's quilt so much that I've decided to re-draft the patterns in EQ5 to more closely resemble the original, while keeping the rainbow color scheme. So far I have 2 rows re-drafted. The re-draft is being done in colors that are similar to the ones in the original quilt. I'll have to import my blocks into the DJ software and re-color them for my rainbow design.

The changes are very suble, and only a slightly insane person such as myself might bother with it, but I really like the slightly more "hodge-podge" appearance without the evenness of the sashing.

So here's to starting over!

Wednesday, June 24, 2009

F-6 Deanie's Daisies

F-6 Deanie's Daisies
32 Pieces
Connie-Jane 7,0,0,162

The corners of the block were paper-pieced. Each section had a diamond, with the four triangles added to make the square.

I pieced the center. Curved piecing seemed preferable to appliqueing at the time. But after sewing it, I think next time I'll go with applique. I think some background fabric around the outside of the applique would look better than this pieced version.